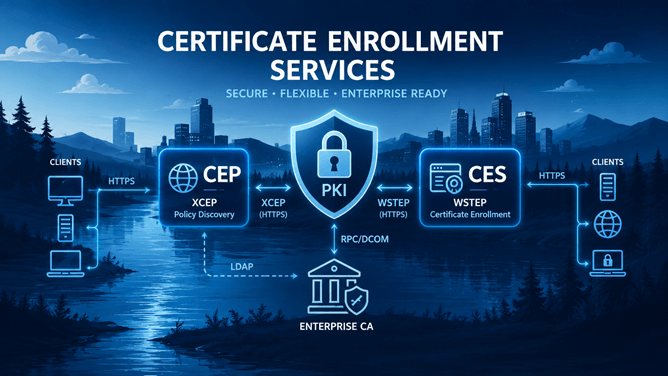
In the first article of this series, I explored the architecture behind Microsoft Certificate Enrollment Services (CEP & CES) and discussed why Microsoft introduced these web services.I looked at the differences between traditional Active Directory Certificate Services enrollment and the HTTPS-based enrollment model, explained the XCEP and WSTEP protocols, and followed the complete certificate enrollment process from start to finish. Now it’s time to move from theory to implementation.
In this article, I’ll build a complete Certificate Enrollment Policy Web Service (CEP) from scratch using PowerShell. Rather than simply installing the Windows role, I’ll also prepare Active Directory, create the required security groups, configure a Group Managed Service Account (gMSA), install IIS, configure the supported authentication methods, and validate that the deployment is functioning correctly. By the end of this article, you’ll have a fully operational Certificate Enrollment Policy Web Service capable of serving enrollment policies over HTTPS using Kerberos, Username/Password, or Client Certificate authentication.
In the next article, I’ll build the Certificate Enrollment Web Service (CES), completing the Microsoft Certificate Enrollment Services architecture and enabling clients to request certificates over HTTPS using the WSTEP protocol.
Microsoft Certificate Enrollment Services series
This article is part of a series covering Microsoft Certificate Enrollment Services from architecture and deployment to high availability and troubleshooting.
- Part 1 – Understanding the Architecture
- Part 2 – Installing the Certificate Enrollment Policy Web Service (CEP)
- Part 3 – Installing the Certificate Enrollment Web Service (CES)
- Part 4 – Using Certificate Enrollment Services in Practice
- Part 5 – Building a Highly Available CEP/CES Infrastructure
Prerequisites
Before installing the Certificate Enrollment Policy Web Service, several prerequisites must already be in place. Most of these requirements relate to the communication between clients and the CEP server. For this walkthrough, the following lab environment is used:
| Server | Role |
|---|---|
| lab-dc-01 | Active Directory Domain Controller |
| lab-srv-01 | IIS Certificate Distribution Point (CDP/AIA) |
| lab-srv-02 | Enterprise Certification Authority |
| lab-srv-03 | Certificate Enrollment Policy (CEP) Server |
| lab-srv-04 | Certificate Enrollment Web Service (CES) Server (used in Part 3) |
| lab-srv-10 | Offline Root Certification Authority |
In addition, the following prerequisites should already be satisfied before continuing with the installation:
- The CEP server must be joined to the Active Directory domain. I’m using Windows Server 2025 for this lab.
- The IIS application pool identity requires the Log on as a service user right when using a Group Managed Service Account (gMSA). This is the default, but you better check it upfront.
- TCP port 443 (HTTPS) must be accessible to clients, check any intermediate firewalls.
With the prerequisites in place, we can start preparing Active Directory for the deployment.
Preparing Active Directory
Before installing the Certificate Enrollment Policy Web Service, I’ll first prepare Active Directory by creating the required security groups, certificate template, and Group Managed Service Account (gMSA). These components provide the foundation for a secure and manageable CEP deployment.
Create a security group for TLS certificate enrollment
I’ll start by creating a dedicated security group that controls which servers are allowed to enroll for the CEP TLS certificate. Using a security group simplifies administration and avoids assigning permissions directly to individual computer accounts.
$GroupName = "GG-T0-PKI Enroll TLS Certificates"

$GroupParameters = @{
    Name            = $GroupName
    SamAccountName  = $GroupName
    GroupScope      = "Global"
    GroupCategory   = "Security"
    Path            = "OU=Groups,OU=Tier 0,OU=Admin,DC=corp,DC=michaelwaterman,DC=nl"
    Description     = "Members are allowed to enroll Web Server certificates."
}

New-ADGroup @GroupParametersAdd the CEP server to the security group
Add the future CEP server to the security group. After updating the group membership, reboot the server so the new permissions become effective.
Add-ADGroupMember `
    -Identity "GG-T0-PKI Enroll TLS Certificates" `
-Members "lab-srv-03$"Create a TLS certificate template
The Certificate Enrollment Policy Web Service requires a TLS certificate to secure all HTTPS communication between clients and the server. I’ll create a dedicated certificate template rather than reusing the default Web Server template, allowing us to apply settings specifically for the CEP service.
- Open the Certification Authority console.
- Expand Certificate Templates.
- Right-click Certificate Templates and select Manage.
- Right-click the Web Server template and select Duplicate Template.
- Configure the template using the following settings:
Compatibility
| Setting | Value |
|---|---|
| Certification Authority | Windows Server 2012 R2 |
| Certificate Recipient | Windows 8.1 / Windows Server 2012 R2 |
General
| Setting | Value |
|---|---|
| Template display name | Lab Active Directory TLS Certificate |
| Template name | LabActiveDirectoryTLSCertificate |
| Validity period | 1 Year |
Cryptography
| Setting | Value |
|---|---|
| Provider Category | Key Storage Provider |
| Algorithm | ECDH_P256 |
| Minimum key size | 256 |
| Provider | Microsoft Software Key Storage Provider |
| Request hash | SHA256 |
Subject Name
Select Build from Active Directory information and configure the following options:
| Setting | Value |
|---|---|
| Subject name format | DNS Name |
| Subject Alternative Name | DNS Name |
| User Principal Name (UPN) | Not enabled |
Security
- Click Add.
- Add the GG-T0-PKI Enroll TLS Certificates security group.
- Grant the following permissions:
- Enroll
- Autoenroll
- Click OK to save the template.
- Close the Certificate Templates console.
Publish the certificate template
Before the template can be used, it must be published on the Enterprise Certification Authority.
- Open the Certification Authority console.
- Right-click Certificate Templates.
- Select New ➜ Certificate Template to Issue.
- Select Lab Active Directory TLS Certificate.
- Click OK.
The template is now available for enrollment.
Request the TLS certificate
Once the certificate template has been published, request a certificate on the future CEP server. The certificate thumbprint will be used later when installing the Certificate Enrollment Policy Web Service.
$TemplateName = "LabActiveDirectoryTLSCertificate"

$Certificate = Get-Certificate `
    -Template $TemplateName `
    -CertStoreLocation "Cert:\LocalMachine\My"

$Certificate.CertificateNote! The displayed thumbprint is later used during the installation of the CEP service
Configure the Group Managed Service Account (gMSA)
To improve security and eliminate password management, I’ll use a Group Managed Service Account (gMSA) for the IIS application pool hosting the Certificate Enrollment Policy Web Service. Before the account can be installed on the CEP server, a few Active Directory preparation steps are required.
Install the KDS Root Key
A Key Distribution Services (KDS) Root Key is required before Group Managed Service Accounts can be used within the Active Directory forest. If your environment already uses gMSAs, this step can be skipped.
Add-KdsRootKey –EffectiveTime ((get-date).addhours(-10))Note! In production environments, create the KDS Root Key using
-EffectiveImmediatelyand allow sufficient time for replication before creating the gMSA. In a lab environment, you can backdate the effective time by 10 hours to make the key available immediately using the code above.Note! Key is stored in:
CN=Master Root Keys,CN=Group Key Distribution Service, CN=Services,CN=Configuration,DC=domain,DC=local
Create a security group for CEP servers
Create a security group that contains all servers allowed to retrieve the managed password of the CEP gMSA. Adding additional CEP servers later only requires adding the computer account to this group.
$GroupName = "GG-T0-CEP Servers"

$GroupParameters = @{
    Name            = $GroupName
    SamAccountName  = $GroupName
    GroupScope      = "Global"
    GroupCategory   = "Security"
    Path            = "OU=Groups,OU=Tier 0,OU=Admin,DC=corp,DC=michaelwaterman,DC=nl"
    Description     = "Members are allowed to retrieve the password for the CEP gMSA."
}

New-ADGroup @GroupParametersAdd computer members to the security group
Add the future CEP server to the “GG-T0-CEP Servers” security group. This grants the server permission to retrieve the managed password of the Group Managed Service Account (gMSA). Run the following PowerShell command:
Add-ADGroupMember `
    -Identity "GG-T0-CEP Servers" `
-Members "lab-srv-03$"Note! You must reboot the computer to update the group membership.
Create the group managed service account
Create the Group Managed Service Account that will later be assigned to the IIS application pool hosting the Certificate Enrollment Policy Web Service.
$DomainFqdn       = (Get-ADDomain).DNSRoot
$gMSAName         = "gMSA_CEP"

$gMSAParameters = @{
    Name                                       = $gMSAName
    DNSHostName                                = "$gMSAName.$DomainFqdn"
    PrincipalsAllowedToRetrieveManagedPassword = Get-ADGroup "GG-T0-CEP Servers"
    Path                                       = "OU=Service Accounts,OU=Tier 0,OU=Admin,DC=corp,DC=michaelwaterman,DC=nl"
    Enabled                                    = $true
}

New-ADServiceAccount @gMSAParametersConfigure the Service Principal Names (SPNs)
Rather than registering SPNs manually, the following script automatically enumerates all computer accounts that are members of the CEP Servers security group and registers the required HTTP SPNs for each server. This approach makes the configuration scalable and simplifies future expansions.
$GroupName = "GG-T0-CEP Servers"
$gMSAName  = "gMSA_CEP"

$SPNs = Get-ADGroupMember -Identity $GroupName |
    Where-Object objectClass -eq "computer" |
    ForEach-Object {

        $Computer = Get-ADComputer $_ -Properties DNSHostName

        @(
            "HTTP/$($Computer.Name)"
            "HTTP/$($Computer.DNSHostName)"
        )
    }

Set-ADServiceAccount `
    -Identity $gMSAName `
    -Replace @{
        ServicePrincipalName = $SPNs
}Install the Active Directory PowerShell module
Install the Active Directory PowerShell module on the future CEP server. This module is required to install and validate the Group Managed Service Account.
Add-WindowsFeature RSAT-AD-PowerShellInstall the Group Managed Service Account
Install the Group Managed Service Account on the CEP server.
$gMSAName = "gMSA_CEP"

try {
    Install-ADServiceAccount `
        -Identity $gMSAName `
        -ErrorAction Stop
    Write-Host "Successfully installed gMSA '$gMSAName'." -ForegroundColor Green
}
catch {
    if ($_.Exception.Message -match "already exists|already installed") {
        Write-Host "gMSA '$gMSAName' is already installed." -ForegroundColor Yellow
    }
    else {
        throw
    }
}Validate the Group Managed Service Account
Before continuing with the installation, verify that the Group Managed Service Account was successfully installed and can retrieve its managed password.
$gMSAName = "gMSA_CEP"

if (Test-ADServiceAccount -Identity $gMSAName) {
    Write-Host "gMSA validation successful." -ForegroundColor Green
}
else {
    throw "gMSA validation failed."
}Add the gMSA to the IIS_IUSRS group
Finally, add the Group Managed Service Account to the local IIS_IUSRS group. This grants IIS permission to use the account for the application pool.
$Parameters = @{
    Group  = "IIS_IUSRS"
    Member = "$((Get-ADDomain).NetBIOSName)\gMSA_CEP$"
}

Add-LocalGroupMember @ParametersInstalling Internet Information Services
The Certificate Enrollment Policy Web Service is hosted in Internet Information Services (IIS). Although the CEP installation wizard automatically installs the required IIS components, I prefer installing IIS separately. This provides access to the IIS management tools and makes it easier to verify and customize the installation if needed. To install IIS together with the management tools, run:
$Features = @{
    Name                   = "Web-Server"
    IncludeManagementTools = $true
}

Install-WindowsFeature @FeaturesAlternatively, if you prefer to install only the required IIS components, use the following command:
$Features = @(
  "Web-Server"
	"Web-WebServer"
	"Web-Common-Http"
	"Web-Default-Doc"
	"Web-Dir-Browsing"
	"Web-Http-Errors"
	"Web-Static-Content"
	"Web-Health"
	"Web-Http-Logging"
	"Web-Performance"
	"Web-Stat-Compression"
	"Web-Security"
	"Web-Filtering"
	"Web-Mgmt-Tools"
	"Web-Mgmt-Console"
)

Install-WindowsFeature `
-Name $FeaturesConfigure the Windows firewall
The Certificate Enrollment Policy Web Service communicates exclusively over HTTP and HTTPS. Enable the required Windows Firewall rules before continuing with the installation.
Enable-NetFirewallRule -Name "IIS-WebServerRole-HTTP-In-TCP"
Enable-NetFirewallRule -Name "IIS-WebServerRole-HTTPS-In-TCP"Installing the Certificate Enrollment Policy Web Service
With all Active Directory components in place, we can now install the Certificate Enrollment Policy Web Service (CEP). The required Windows feature installs the CEP role, after which I’ll configure the different authentication methods and IIS settings in the following sections. Install the Certificate Enrollment Policy Web Service by running the following PowerShell command:
$Features = @{
    Name                   = "ADCS-Enroll-Web-Pol"
    IncludeManagementTools = $false
}

Install-WindowsFeature @FeaturesConfigure Kerberos authentication
The first authentication method I’ll configure is Kerberos, which is the preferred option for domain-joined clients. Before installing the CEP service, the script automatically locates a valid TLS certificate that matches the server’s fully qualified domain name (FQDN) and uses its thumbprint during the installation.
$CepFqdn = "$env:COMPUTERNAME.$((Get-ComputerInfo).CSDomain)"

$Cert = Get-ChildItem -Path "Cert:\LocalMachine\My" |
    Where-Object {
        $_.DnsNameList.Unicode -contains $CepFqdn -and
        $_.HasPrivateKey -and
        $_.NotBefore -le (Get-Date) -and
        $_.NotAfter  -gt (Get-Date) -and
        $_.EnhancedKeyUsageList.ObjectId -contains "1.3.6.1.5.5.7.3.1"
    } |
    Sort-Object NotAfter -Descending |
    Select-Object -First 1

if (-not $Cert) {
    throw "No valid TLS certificate for '$CepFqdn' was found in Cert:\LocalMachine\My."
}

Write-Host "Using TLS certificate:" -ForegroundColor Cyan
$Cert | Format-List Subject, Thumbprint, NotAfter, HasPrivateKey

$CepConfigurationParameters = @{
    AuthenticationType = "Kerberos"
    SSLCertThumbprint   = $Cert.Thumbprint
    Force               = $true
}

Install-AdcsEnrollmentPolicyWebService @CepConfigurationParametersConfigure Username/Password authentication
Username/Password authentication enables non-domain-joined systems, such as workgroup or DMZ servers, to retrieve enrollment policies over HTTPS. The installation process is identical to Kerberos authentication, with only the authentication method changing. AuthenticationType = "UserName".
$CepConfigurationParameters = @{
    AuthenticationType = "UserName"
    SSLCertThumbprint   = $Cert.Thumbprint
    Force               = $true
}Username/Password authentication requires Kerberos Protocol Transition. Enable the TrustedToAuthForDelegation flag on the CES gMSA before installing the service.
Configure client certificate authentication
Client Certificate authentication allows clients to authenticate using an existing certificate instead of Kerberos or user credentials. This method is commonly used for certificate renewal scenarios and environments where passwordless authentication is preferred. The installation process is identical to Kerberos or Username / Password authentication, with only the authentication method changing. AuthenticationType = "Certificate".
$CepConfigurationParameters = @{
    AuthenticationType = "Certificate"
    SSLCertThumbprint   = $Cert.Thumbprint
    Force               = $true
}Key-Based renewal
The Certificate Enrollment Web Policy Service optionally supports Key-Based Renewal, allowing clients to renew an existing certificate using possession of the current private key as proof of identity. This can be enabled using the -AllowKeyBasedRenewal parameter during installation. It is primarily intended for certificate renewal scenarios and is not required for initial certificate enrollment.
Note! If you plan to support key-based certificate renewal, enable Key-Based Renewal on both the Certificate Enrollment Policy Web Service (CEP) and the Certificate Enrollment Web Service (CES). This ensures that the enrollment policy presented to clients matches the capabilities of the enrollment service.
Configure the IIS application pool identity
By default, the WSEnrollmentPolicyServer application pool runs under the built-in ApplicationPoolIdentity account. To enable Kerberos authentication and eliminate password management, I’ll configure the application pool to run under the Group Managed Service Account (gMSA) created earlier. Run the following PowerShell command to configure the application pool identity:
Import-Module WebAdministration

$AppPoolName = "WSEnrollmentPolicyServer"
$DomainName  = (Get-ADDomain).NetBIOSName
$gMSAName    = "gMSA_CEP$"
$Identity    = "$DomainName\$gMSAName"

$AppPoolPath = "IIS:\AppPools\$AppPoolName"

if (-not (Test-Path $AppPoolPath)) {
    throw "Application pool '$AppPoolName' was not found."
}

Set-ItemProperty `
    -Path $AppPoolPath `
    -Name processModel.identityType `
    -Value 3

Set-ItemProperty `
    -Path $AppPoolPath `
    -Name processModel.userName `
    -Value $Identity

Set-ItemProperty `
    -Path $AppPoolPath `
    -Name processModel.password `
    -Value ""

Restart-WebAppPool -Name $AppPoolName Configure the CEP friendly name
The Friendly Name is displayed to clients when selecting a Certificate Enrollment Policy Server. Configuring a descriptive name makes it easier to distinguish the service from other enrollment policy servers in the environment. Run the following PowerShell command to update the friendly name:
Import-Module WebAdministration

$SiteName        = "Default Web Site"
$ApplicationName = "ADPolicyProvider_CEP_Kerberos"
$FriendlyName    = "Corporate Certificate Enrollment Policy"

$ApplicationPath = "IIS:\Sites\$SiteName\$ApplicationName"

Set-WebConfigurationProperty `
    -PSPath $ApplicationPath `
    -Filter "/appSettings/add[@key='FriendlyName']" `
    -Name "value" `
-Value $FriendlyNameNote! Update the $ApplicationName variable if you are configuring the Username/Password (ADPolicyProvider_CEP_UsernamePassword) or Certificate (ADPolicyProvider_CEP_Certificate) Authentication endpoint instead of the Kerberos endpoint. All the binaries are installed in the directory:
“C:\Windows\systemdata\CEP”.
Note! All these settings can be found in the “Application settings” of the installed provider.
Validating the certificate enrollment policy web service
With the installation now complete, the final step is to verify that each authentication endpoint is functioning correctly. In this section, I’ll validate the Kerberos, Username/Password, and Client Certificate endpoints using certutil. A successful response confirms that the Certificate Enrollment Policy Web Service is correctly configured and ready for use.
Validate Kerberos authentication
Use the following command from a domain-joined computer to verify that the Kerberos endpoint is accessible.
$CepFqdn = "lab-srv-03.corp.michaelwaterman.nl"
$CepUrl  = "https://$CepFqdn/ADPolicyProvider_CEP_Kerberos/service.svc/CEP"

$Output = & certutil.exe `
    -ping `
    -kerberos `
    -config $CepUrl `
    CEP

if ($LASTEXITCODE -eq 0) {
    Write-Host "CEP '$CepUrl' is responding successfully." -ForegroundColor Green
}
else {
    throw "CEP test failed:`n$($Output -join "`n")"
}The response should be: “CEP 'https://lab-srv-03.corp.michaelwaterman.nl/ADPolicyProvider_CEP_Kerberos/service.svc/CEP' is responding successfully.“
Validate Username/Password authentication
The following command verifies the Username/Password endpoint using username and password.
$UserName = "CORP\Superuser"
$Password = "P@ssw0rd!"
$CepUrl   = "https://lab-srv-03.corp.michaelwaterman.nl/ADPolicyProvider_CEP_UsernamePassword/service.svc/CEP"

$Output = & certutil.exe `
    -UserName $UserName `
    -p $Password `
    -ping `
    -config $CepUrl `
    CEP

if ($LASTEXITCODE -eq 0) {

    Write-Host "Successfully connected to the CEP endpoint using username/password authentication." -ForegroundColor Green

}
else {

    throw "Failed to connect to the CEP endpoint.`n$($Output -join "`n")"

}Note! This test will trigger a Windows Defender warning because credentials are supplied on the command line. This behavior is expected in this lab scenario.
Validate client certificate authentication
Finally, validate the Client Certificate endpoint using an existing client authentication certificate. That is if you have a client authentication certificate available.
$ClientCertificateThumbprint = "<Thumbprint>"
$CepFqdn                     = "lab-srv-03.corp.michaelwaterman.nl"
$CepUrl                      = "https://$CepFqdn/ADPolicyProvider_CEP_Certificate/service.svc/CEP"

$ClientCertificate = Get-Item `
    -Path "Cert:\CurrentUser\My\$ClientCertificateThumbprint" `
    -ErrorAction Stop

$Output = & certutil.exe `
    -ClientCertificate $ClientCertificate.Thumbprint `
    -ping `
    -config $CepUrl `
    CEP 2>&1

if ($LASTEXITCODE -eq 0) {
    Write-Host "Certificate authentication to CEP succeeded." -ForegroundColor Green
}
else {
    throw "Certificate authentication to CEP failed.`n$($Output -join "`n")"
}Summary
Congratulations! You now have a fully operational Certificate Enrollment Policy Web Service (CEP) supporting Kerberos, Username/Password, and Client Certificate authentication. Although clients can now successfully retrieve enrollment policies using XCEP, certificate enrollment is not yet possible.
In the next article, I’ll deploy the Certificate Enrollment Web Service (CES), completing the Microsoft Certificate Enrollment Services architecture and enabling clients to request certificates securely over HTTPS using the WSTEP protocol.
0 Comments
1 Pingback