Update 26-12-2025: Uploaded new and improved PowerShell scripts to GitHub. Added Windows 11, Ubuntu Server & Ubuntu Desktop to the repository.
In June 2023, I wrote a blog about the principle of clean source. At its core, clean source is about knowing exactly what you are using as the foundation of your installations, and automating that process so the outcome is predictable and repeatable.
Back then, I relied on what we now have to call legacy tooling. While that approach still works, it was already showing its age. Tools like MDT have been deprecated for quite some time, and although community efforts try to keep them alive, it’s clear that this path is slowly coming to an end.
That realization pushed me to take a step back and ask a simple question: why not approach this from a DevOps mindset instead? As it turns out, that opened the door to some pretty cool possibilities.
During that search, I came across a HashiCorp tool called Packer. And honestly, it immediately clicked. Coincidentally, it was around Black Friday, which gave me the perfect excuse to pick up a Udemy course and dive in properly. After completing the course, I started exploring what was already out there.
What I quickly noticed was that most available content focuses heavily on automating Linux installations. When it comes to Windows, especially in combination with Proxmox, the information becomes surprisingly scarce. Since Proxmox is the backbone of my home lab, that left me with a clear goal, figure out how to build automated Windows images using Packer on Proxmox.
While there are snippets scattered across blogs and forums, and one excellent guide on VirtualizationHowTo, I wanted to fully understand the process myself. Not just follow instructions, but experience the entire lifecycle, including the sharp edges. That exploration marked my real entry into the DevOps world.
This article walks through how I moved from manual Windows image creation to a reproducible, secure, and auditable Packer-based workflow on Proxmox. I won’t overwhelm you with large blocks of code here, all Packer configuration files are available on my GitHub for reference and reuse. What I will do is walk you through the Proxmox configuration, explain each step of the Windows image build process, and highlight what you need to change to make this setup your own.
Note! This setup is designed for controlled build environments and not intended for direct use on production endpoints. Test before use.
Let’s dig in.
What’s Hashicorp Packer anyway?
At its core, HashiCorp Packer is a tool for building machine images in a repeatable, automated, and predictable way. Instead of manually installing an operating system, applying updates, installing software, and making a lot of mistakes, Packer allows you to describe that entire process as code.
You define what an image should look like, not how many times you are willing to click through an installer.
Packer works by starting a virtual machine, installing the operating system, applying configuration and provisioning steps, and then turning the end result into a reusable image or template. Once the build is finished, the temporary VM is converted, leaving you with a clean, reproducible artifact. If you need to rebuild the image, you simply run the same configuration again and get the same result.
One of the strengths of Packer is that it doesn’t try to do everything itself. Instead, it acts as an orchestrator. It knows how to talk to different Cloud or on-prem platforms through so-called builders, such as VMware, Hyper-V, Cloud providers, and in my case, Proxmox. For configuring the operating system, it relies on provisioners, which can be as simple as shell scripts or PowerShell, or as advanced as configuration management tools.
What makes Packer particularly interesting from a DevOps perspective is that image builds become versioned, testable, and auditable. Your base images are no longer “that one VM someone built six months ago,” but a documented process that lives alongside your other infrastructure code. If something changes, you can track when and why it changed.
For Windows, this approach is especially powerful, and also more challenging. Windows installations come with reboots, timing issues, driver dependencies, and services that may or may not be ready when you expect them to be. Packer doesn’t magically solve these problems, but it gives you a structured framework to handle them in a controlled and repeatable way.
In short, Packer shifts the focus from managing virtual machines to managing image definitions. Once you make that mental switch, it becomes clear why it fits so well in a DevOps workflow, and why it’s such a natural next step when moving away from ClickOps.
How Packer works
Before diving deeper into the actual build process, it helps to briefly understand how Packer itself operates. Packer is intentionally minimalistic, it does one thing well, building images, and exposes that functionality through a small set of clear commands.
Packer configuration and HCL files
Modern Packer configurations are written in HCL (HashiCorp Configuration Language). HCL is declarative by design, instead of scripting how something should happen, you describe what the desired outcome looks like.
In practice, a Packer configuration usually consists of:
- Source blocks, which define where and how images are built (Proxmox in this case)
- Build blocks, which define what happens inside the VM once it becomes reachable
- Optional variables and locals to keep configurations reusable and readable
This structure allows image builds to be versioned, reviewed, and reasoned about like any other piece of infrastructure code. There’s much more involved as you will find out, but this is the gist of it.
packer init .
packer init .The first step in any Packer project is initialization. This command downloads and prepares all required plugins, such as the Proxmox builder plugin used in this setup. It ensures that the local environment is ready before any validation or build steps are executed.
packer fmt .
packer fmt .The fmt command automatically formats all HCL files according to Packer’s style conventions. While not strictly required, it greatly improves readability and consistency, especially when configurations grow larger or are shared across teams.
packer validate .
packer validate .Before starting a build, packer validate checks whether the configuration is syntactically correct and internally consistent. This step catches missing variables, invalid references, and configuration errors early, long before any virtual machine is created.
packer build .
packer build .This is where everything comes together. The build command executes the full image creation process, provisioning resources, starting the VM, installing the operating system, running provisioning steps, and finally producing a reusable image or template.
From this point on, Packer takes over and orchestrates the entire lifecycle described in the previous chapter.
The role of HCL files
Packer configurations are written in HCL, but in practice the structure is just as important as the syntax. Keeping files logically separated makes image builds easier to understand, maintain, and extend over time.
In this setup, the configuration is split across multiple HCL files, each with a clear responsibility. Packer automatically loads all .pkr.hcl files in the working directory, so the exact file names matter less than the structure they represent.
Source files
Source-related HCL files define how and where the image is built. In this case, they describe the Proxmox environment: VM hardware settings, storage, networking, boot behavior, and the dynamically generated ISO used during installation.
Think of these files as the blueprint of the virtual machine before an operating system exists.
Build files
Build-related HCL files describe what happens inside the VM once Packer can communicate with it. This includes provisioning steps such as:
- Running PowerShell scripts
- Applying system configuration
- Preparing the system for sysprep
- Final cleanup before templating
These steps are executed in a deterministic order and form the final shape of the image.
variables.pkr.hcl
The variables.pkr.hcl file defines all configurable inputs used throughout the build. This includes values such as:
- Proxmox connection details
- Storage targets
- Network configuration
- Windows version selection
- Build-time credentials
Separating variables from logic keeps the configuration flexible. The same HCL code can be reused across environments simply by changing variable values, without touching the actual build logic. It also reduces the risk of hardcoded values creeping into the configuration.
In practice, this file becomes the main entry point for adapting the build to your own environment.
By structuring HCL files around sources, build logic, and variables, the entire image build process becomes easier to reason about. When something changes, you immediately know where to look. When something breaks, you know which layer is responsible.
Want to know more?
This chapter intentionally keeps things high-level. If you want a much deeper understanding of Packer itself, including advanced HCL patterns, plugin behavior, and debugging techniques, I can highly recommend the Udemy training I followed myself. I’ll include the link separately for those who want to explore Packer in more detail.
Windows vs Linux builds, same difference
At first glance, using Packer for Windows and Linux image builds looks almost identical. You define a builder, add some provisioning steps, and let automation do the work. In practice, however, the two worlds could not be more different.
Linux installations have largely evolved around cloud-init. Modern Linux distributions are designed to accept configuration dynamically at boot time: users, SSH keys, packages, network settings, all injected on demand. This makes Linux image builds flexible by nature. The base image can remain relatively generic, while the final configuration is applied dynamically when the VM is instantiated.
Windows, on the other hand, comes from a very different history. Automated Windows installations long predate cloud concepts and are built around answer files, most notably Autounattend.xml. These files describe the entire installation process upfront: disk layout, language settings, users, drivers, and post-install actions. Once the installation starts, Windows expects everything it needs to already be present.
That difference alone makes Windows image builds more rigid and far less forgiving.
From a Packer perspective, this means that Linux builds often focus on post-install provisioning, while Windows builds are heavily front-loaded. If something is missing or unavailable during setup, the installation simply fails, often without very helpful error messages, well at least if you don’t know where to look.
VMware vs Proxmox
Historically, most examples of automated Windows image builds with Packer are based on VMware. There is a good reason for that. VMware provides a simple and effective mechanism to attach a virtual floppy disk to a VM during installation. Since Windows explicitly scans removable media for an Autounattend.xml file, this approach fits perfectly with how Windows setup works.
Proxmox, however, does not offer virtual floppy devices in the same way. That seemingly small difference breaks a lot of existing assumptions and examples. When I started experimenting with Packer and Proxmox, I quickly ran into this limitation.
My first instinct was to modify the original Windows installation ISO and bake the Autounattend.xml directly into it. While technically feasible, this approach felt wrong. Modifying installation media introduces state, makes builds less transparent, and goes directly against the idea of keeping everything dynamic and reproducible.
I wanted a solution that stayed true to the DevOps mindset: no manual ISO editing, no hidden steps, and no pre-baked artifacts that are hard to track.
A Proxmox-native solution
The breakthrough came when I discovered a feature in the Proxmox Packer provider that allows for the creation of on-demand ISO images. Instead of relying on a static installation medium, Packer can dynamically generate an ISO during the build process and attach it to the VM at install time.
This technique turned out to be the missing piece. By using an on-demand ISO, I could dynamically provide everything Windows setup expects from removable media:
- Autounattend.xml file
- Required drivers
- PowerShell scripts
- Additional installation assets
All of this without touching the original Windows ISO.
The result is a fully dynamic installation process that closely mirrors the VMware floppy-based approach, but fits naturally within the Proxmox ecosystem. More importantly, it keeps the entire build process declarative, reproducible, and version-controlled.
With that foundation in place, we can now zoom in on the Proxmox side of the setup and see how this actually works in practice.
Setting up Proxmox
Alright, let’s do this.
I’m not going to walk you through a full Proxmox installation from start to finish. That’s not the goal here. What I do want is to make sure your Proxmox environment is set up in a way that allows the provided Packer files to work out of the box, or at least very close to it.
To give some context, this is the setup I’m working with:
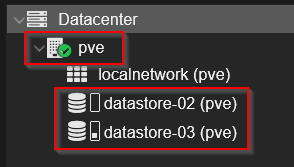
- PVE: The name of the Proxmox node.
- Localnetwork: The name of my network zone.
- Datastore-02: The storage location for the templates.
- Datastore-03: The storage location of my iso files.
Creating a dedicated resource pool
pvesh create /pools -poolid TemplatesThis command creates a dedicated resource pool named Templates (this is case sensitive). Using a separate pool for Packer-built templates helps keep things organized and limits the scope of permissions. Instead of granting access across the entire Proxmox environment, we can restrict automation to only the resources it actually needs.
Creating a service account for Packer
pveum user add automation@pve --comment "Packer Automation Service Account"Rather than using a personal account or the root user, a dedicated service account is created for Packer. This aligns with the principle of least privilege and makes it easier to audit and rotate credentials later on. Everything Packer does in Proxmox will be clearly traceable to this account.
Creating an API token for Packer
pveum user token add automation@pve packer-token --privsep=0Please Note! The generated secret will only be shown once, store it in a secure location.

To allow Packer to communicate with Proxmox, an API token is used instead of a traditional username and password. This command generates an API token for the previously created automation@pve service account. Packer will use this token to authenticate against the Proxmox API backend, which is exposed at:
https://<IP or FQDN>:8006/api2/jsonWhy API tokens instead of username and password?
Using an API token has several advantages over authenticating with a regular user password.
First, API tokens are purpose-built for automation. They are designed to be used by non-interactive systems like Packer and can be scoped to a specific role with clearly defined permissions. This makes it much easier to apply the principle of least privilege.
Second, tokens are easier to rotate and revoke. If a token is ever compromised, it can be invalidated without impacting the underlying user account. There is no need to reset passwords or risk breaking other automation that might rely on the same credentials.
Third, API tokens reduce exposure. There is no interactive login associated with the token, and it cannot be used to access the Proxmox web interface. This significantly limits the blast radius compared to a full user account with a reusable password.
Finally, using tokens makes the intent explicit, this account exists solely for automation. There is no ambiguity about how or why it is being used.
A note on --privsep=0
The --privsep=0 flag ensures that the token uses the permissions assigned directly to the user and role configuration, rather than requiring additional privilege separation. In this setup, permissions are already tightly controlled through the custom automation role, making this a clean and predictable choice.
Defining a custom automation role
pveum roleadd AutomationRole -privs "
Datastore.Allocate
Datastore.AllocateSpace
Datastore.AllocateTemplate
Datastore.Audit
Pool.Allocate
Pool.Audit
SDN.Audit
SDN.Use
VM.Allocate
VM.Audit
VM.Backup
VM.Clone
VM.Config.CDROM
VM.Config.CPU
VM.Config.Cloudinit
VM.Config.Disk
VM.Config.HWType
VM.Config.Memory
VM.Config.Network
VM.Config.Options
VM.Console
VM.GuestAgent.Audit
VM.GuestAgent.Unrestricted
VM.Migrate
VM.PowerMgmt
VM.Snapshot
VM.Snapshot.Rollback
"This step defines a custom role tailored specifically for Packer automation. The listed privileges allow Packer to create, configure, and manage virtual machines and templates without granting unnecessary administrative rights. By explicitly defining each permission, we avoid over-privileged roles while still enabling a fully automated image build process.
Granting access to the template datastore
pveum aclmod /storage/datastore-02 \
-user automation@pve \
-role AutomationRoleHere, the automation account is granted access to the first datastore used for VM disks and templates. This allows Packer to allocate storage, create disks, and convert completed builds into reusable templates.
Granting access to an ISO datastore
pveum aclmod /storage/datastore-03 \
-user automation@pve \
-role AutomationRoleIf multiple datastores are involved, the automation account needs access to each one explicitly. This keeps storage access granular and predictable, especially in environments where templates and ISO images are separated across different storage backends.
Assigning permissions to the Templates pool
pveum aclmod /pool/Templates \
-user automation@pve \
-role AutomationRoleThis command ties the automation account to the previously created Templates pool. From this point on, Packer can only create and manage resources within this pool, providing a clean boundary between automated builds and manually managed workloads.
Allowing access to the SDN zone
pveum aclmod /sdn/zones/localnetwork \
-user automation@pve \
-role AutomationRoleFinally, access is granted to the SDN zone used during the build process. This allows Packer to attach network interfaces and ensures the VM has connectivity during installation and provisioning, without exposing the entire network configuration to the automation account.
This should cover all the permissions you need to set for building Packer templates. Unfortunately these permissions aren’t documented anywhere, so I did a bit of research and tested it thoroughly. One aspect of Packer is that it will actually tell you which permission is missing during it’s execution, no worries you can’t break anything, just start over.
The Packer build process – high-level overview
Running "packer build .” may look like a single command, but under the hood quite a lot happens. To keep things understandable, the entire process can be divided into four distinct phases. Each phase has a clear responsibility and builds on the previous one.
Phase 0: Source configuration (Proxmox-specific setup)
Before anything is built, Packer first evaluates the source configuration in the .hcl files. This is where the virtual machine is defined: how it should look, where it should live, and which resources it is allowed to use. For Proxmox, this phase is especially important because it also enables the dynamic ISO technique used later in the build. In this phase, no VM is started yet. Packer is essentially preparing the blueprint.
| Step | Description |
|---|---|
| 0.1 | Packer is started using “packer build .” loading all plugins, referenced HCL files, variables, and source definitions. |
| 0.2 | The Proxmox source block defines VM properties such as CPU, memory, firmware type, storage, network, and target pool. |
| 0.3 | API connectivity to Proxmox is established using the dedicated automation service account. |
| 0.4 | An on-demand ISO configuration is prepared, defining which files will be dynamically packaged and attached during installation. |
| 0.5 | Boot parameters and automated keystrokes are defined to control the Windows installer. |
At the end of this phase, Packer has a complete and validated description of the VM it is about to build, but nothing has been created yet.
Phase 1 – Bootstrapping & Windows Setup
This phase covers everything from the moment the VM is created until Windows finishes its initial unattended installation. At this point, Packer does not yet communicate with the guest OS. Control is achieved purely through boot configuration, installation media, and Windows setup logic.
| Step | Description |
|---|---|
| 1 | Packer dynamically generates an ISO containing the contents of /scripts/pre-build. Please note that you need to install the Windows ADK Deployment tools and update the path variable so an ISO can be created. |
| 2 | Files such as Autounattend.xml, Windows drivers, and supporting scripts are placed in the root of the generated ISO. |
| 3 | A new virtual machine is created in Proxmox and powered on. |
| 4 | The Windows installation ISO, the VIRTIO Drivers and the dynamically generated ISO are attached to the VM. |
| 5 | Packer sends an automated Enter keystroke to boot from the Windows installation media. |
| 6 | Windows PE starts and scans removable media for $WinPEDriver$ and Autounattend.xml. |
| 7 | Windows Setup loads the required drivers, configures the disk layout, and applies the Windows image. |
| 8 | The system reboots and continues with the unattended installation process. |
This is the most rigid part of the process. If required files are missing or drivers are unavailable, the build will fail at this stage. Actually I spend a lot of time in this part just to get things right.
Phase 2 – Specialize & first logon automation
Once the base operating system is installed, Windows transitions into its configuration phases. This is where timing, OS version differences, and automation behavior start to matter.
Notably, Windows Server 2022 and 2025 behave differently from older versions. As it turns out there was a change in Windows Server 2022 where I could finally use WMI during the specialize phase! That’s why I copy the build directory to the C:\ drive during this phase and for older systems it’s done during the first logon.
| Step | Description |
|---|---|
| 9 | During the specialize phase on Windows Server 2022 and 2025, Windows dynamically searches for a CD/DVD drive with the label cidata. |
| 10 | On older Windows versions, this search occurs after the first interactive logon instead. |
| 11 | When the cidata volume is found, the build directory is copied to C:\build. |
| 12 | Windows automatically performs the first logon and executes PowerShell scripts from C:\build. |
| 13 | User interaction is blocked to prevent interference with the installation process. |
| 14 | VirtIO drivers are installed by dynamically locating the driver ISO. |
| 15 | WinRM is configured to allow Packer to establish a communicator session. |
This phase bridges the gap between traditional Windows setup and modern infrastructure automation. Next up, yes folks we are finally here, Packer takes over!
Phase 3 – Packer provisioning & image finalization
At this point, Packer finally gains full access to the guest operating system. Using the Proxmox Guest Agent and WinRM as the communicator (as per Packer terminology), it can now execute provisioning steps defined in the build block of the HCL configuration.
| Step | Description |
|---|---|
| 16 | Packer waits for the Proxmox Guest Agent to report the VM’s IP address. |
| 17 | A WinRM connection is established between Packer and the VM. |
| 18 | The Windows boot timeout is reduced to 5 seconds using bcdedit. |
| 19 | Windows Updates are installed, excluding drivers and preview updates. This takes a while. |
| 20 | On Windows Server Core, PowerShell is configured as the default shell. |
| 21 | A finalized Unattend.xml is copied from the locale machine /scripts/post-build to the VM path C:\Windows\System32\Sysprep. |
| 22 | The directory C:\Windows\Setup\Scripts is created on the VM. |
| 23 | SetupComplete.cmd and PostImage-WinRM-Hardening.ps1 are copied into the setup scripts directory on the VM. |
| 24 | Image cleanup and optimization scripts are executed to prepare the system for templating. |
| 25 | Sysprep is executed, causing the VM to shut down. |
| 26 | Packer detects the shutdown and automatically converts the VM into a Proxmox template. The detection can take a couple of minutes. |
At this point, the build is complete. The resulting template is clean, reproducible, and ready to be cloned.
By separating source definition, installation, Windows configuration, and final provisioning, the entire process becomes easier to reason about and troubleshoot. When something breaks, you immediately know which phase to investigate.
This structured approach is what allows a traditionally fragile Windows installation process to fit cleanly into a DevOps workflow.
My build structure/ files explained
In the example I’ll use the Widows Server 2025 Core build. Before looking at individual files, it helps to first understand the overall layout of the build. The repository is intentionally structured around the different phases of the Packer process: source definition, Windows setup, early bootstrapping, and post-build finalization.
Note! All the files mentioned here can be found at my GitHub page.
At a high level, the directory structure looks like this:
Root
ª   variables.pkr.hcl
ª   windows-<>-<>-<>.pkr.hcl
ª
+---scripts
    +---post-build
    ª   ª   cleanup-for-image.ps1
    ª   ª   remove-ie.ps1 (W2K16 Desktop Only)
    ª   ª
    ª   +---setupcomplete
    ª   ª       postImage-winrm-reset.ps1
    ª   ª       SetupComplete.cmd
    ª   ª
    ª   +---unattend
    ª           postoobecleanup.cmd (W2K11 only)
    ª           unattend.xml
    ª
    +---pre-build
        ª   Autounattend.xml
        ª
        +---$WinpeDriver$
        ª   +---disk
        ª   ª       Readme.md
        ª   ª
        ª   +---net
        ª           Readme.md
        ª
        +---build
                lock-screen.ps1
                set-winrm-packer.ps1
start-virtio-install.ps1Each directory maps directly to a specific moment in the image lifecycle:
Root filesdefine what is built and where it is built.Scriptsholds all the files used during the Windows installation.pre-buildcontains everything required during Windows Setup and early configuration, before Packer can communicate with the VM.$WinpeDriver$contains all the drivers needed during pre-installation, copy your own driver files to this directory. More info.Buildcontains the initialization files that run after setup is done.post-buildcontains scripts and configuration used after installation, during provisioning and after cloning the template.SetupCompleteholds the files that will execute after the system is cloned. Replace with your own for a custom configuration.Unattendthe final directory holds the unattend.xml file that configures the target machine after cloning.
This separation is deliberate, it keeps the Windows installation process transparent, avoids hidden state, and makes it clear which files are consumed at which stage of the build. With that context in place, the next sections zoom in on each directory and explain the role of the individual files.
Root files
| File | Purpose |
|---|---|
windows-server-2025-core.pkr.hcl | Main Packer configuration for this build. It defines the Proxmox source, boot behavior, dynamic ISO usage, communicator settings, and the provisioning steps executed during the build phase. |
variables.pkr.hcl | Central location for all configurable values such as Proxmox settings, storage, networking, credentials, and OS-specific parameters. This is the primary file users will adjust to adapt the build to their own environment. |
Scripts/pre-build
| Path / File | Purpose |
|---|---|
Autounattend.xml | Controls the unattended Windows installation. Defines disk layout, language settings, edition selection, initial users, and setup behavior. |
$WinpeDriver$/ | Special directory scanned by Windows PE during setup. Used to inject storage and network drivers early in the installation process. |
$WinpeDriver$/disk/ | Placeholder for storage drivers required during disk detection and partitioning. |
$WinpeDriver$/net/ | Placeholder for network drivers needed during setup or early provisioning. |
build/ | Directory copied to C:\build during the specialize or first-logon phase. Contains scripts used before Packer establishes a WinRM connection. |
Scripts/pre-build/build
| File | Purpose |
|---|---|
lock-screen.ps1 | Temporarily locks the console to prevent user interaction during automated installation and configuration. |
set-winrm-packer.ps1 | Prepares and enables WinRM so Packer can later connect using the WinRM communicator. |
start-virtio-install.ps1 | Dynamically locates the VirtIO driver ISO and installs required drivers inside the guest OS. Use the label of the iso as the reference. See the initial logon steps in the autounattend.xml. |
Scripts/post-build
Files in this directory are used after the Windows installation, either during the Packer provisioning phase or after the template is cloned.
| Path / File | Purpose |
|---|---|
cleanup-for-image.ps1 | Performs image cleanup and optimization to reduce template size and remove temporary artifacts before sysprep. |
remove-ie.ps1 | For Windows Server 2016 only. Removes Internet Explorer from the system. |
unattend/ | Files for post-clone configuration. |
setupcomplete/ | Contains scripts executed automatically the first time a cloned VM boots. |
Scripts/Post-build/unattend
| File | Purpose |
|---|---|
postoobecleanup.cmd | For Windows 11 only. Cleanup script post installation for a cloned VM. |
unattend.xml | Unattend.xml configuration file. |
Scripts/post-build/setupcomplete
| File | Purpose |
|---|---|
SetupComplete.cmd | Entry point executed by Windows Setup after sysprep when a cloned VM boots for the first time. |
postImage-winrm-reset.ps1 | Resets WinRM to more secure default settings after the image has been deployed, ensuring WinRM is not left overly permissive. |
How this fits together
Each directory maps directly to a specific phase of the Packer build process:
- Root HCL files define what is built and where
- Pre-build scripts support Windows Setup and early automation
- Post-build scripts finalize, harden, and prepare the image for reuse
There is no hidden logic and no modified installation media. Every step is explicit, versioned, and reproducible explains.
Configuring the build – variables.pkr.hcl
To adapt this build to your own environment, all variables defined in variables.pkr.hcl need to be reviewed and adjusted. The variables are intentionally explicit and descriptive, so there should be little guesswork involved.
Proxmox connection and environment
| Variable | Description |
|---|---|
proxmox_url | URL of the Proxmox API endpoint Packer connects to. |
proxmox_username | Proxmox user or API token ID used for authentication. |
proxmox_token | API token secret associated with the automation account. |
proxmox_node | Proxmox node on which the VM build is executed. |
Proxmox storage and resource pools
| Variable | Description |
|---|---|
proxmox_storage_pool | Datastore used for the VM disk and resulting template. |
proxmox_iso_storage_pool | Datastore where ISO files (Windows and VirtIO) are stored. |
proxmox_vm_pool | Proxmox resource pool where the VM and template are created. |
Virtual machine identification
| Variable | Description |
|---|---|
vm_id | Numeric VM ID used during the build. Must be unique within Proxmox. |
vm_description | Description applied to the VM and resulting template in Proxmox. |
Installation media
| Variable | Description |
|---|---|
vm_boot_iso | Path to the Windows Server installation ISO. |
vm_virtio_iso | Path to the VirtIO driver ISO used during installation and provisioning. |
Operating system tag-data
| Variable | Description |
|---|---|
vm_os | Operating system family (used for logical grouping and naming). |
vm_os_sku | OS SKU, for example server. |
vm_os_version | Windows Server version (e.g. 2016, 2022, 2025). |
vm_os_edition | Windows edition, such as core or desktop. |
build_version | Logical version identifier for the image build. Useful for tracking iterations. |
A final note on passwords and WinRM
One final detail worth calling out is the temporary password used during the build process.
During the unattended installation, a local administrative account is created via Autounattend.xml. That same account is later used by Packer’s WinRM communicator to connect to the VM. The credentials for WinRM are referenced in the main Packer HCL configuration, while the password itself is also defined in Autounattend.xml.
If you decide to change this password, you must update it in both places:
- WinRM communicator configuration in the main HCL file.
Autounattend.xmlused during installation.
By default, the password is set to P@ssw0rd!.
Yes, I’m fully aware this is about as far from secure as it gets. It’s intentionally simple and used only as a temporary build-time credential. After the image is finalized, WinRM is reset to more restrictive defaults and the account is no longer intended for interactive use. Think of it as a practical example, not a security recommendation.
All that’s left now is for you to do a “Packer init .“, “Packer validate .” and “Packer build .” and off you go!
A final thought
Pfff, so we’re finally at the end, sorry for the long guide, I just wanted to make sure that all I do is explained without a doubt.
In total, I spent well over a month and a half building, breaking, fixing, and rebuilding this process. There were countless test runs, more than a few “why is Windows doing this?” moments, and plenty of deep sighs along the way. At times it genuinely felt like progress came in millimeters rather than meters.
But that’s also where the real value came from.
Going through this process forced me to truly understand what happens during a Windows installation, when certain files are available, how timing differs between versions, and where automation quietly falls apart if you make the wrong assumptions. None of that insight comes from clicking through a wizard once and calling it done.
In many ways, this blog brings me back to the principle of clean source that I wrote about earlier. Knowing exactly what goes into your base image, being able to rebuild it from scratch, and trusting the outcome because the process is transparent, that’s what this is really about. If this write-up saves you some trial and error, helps you avoid a few of the pitfalls I ran into, or simply gives you a better understanding of how Windows image automation actually works under the hood, then all the testing, tweaking, and occasional frustration was absolutely worth it.
My goal was reached, this approach allows me to treat Windows images as immutable artifacts, predictable, auditable, and secure by design. Whoop, whoop, another win!
As always, I really hope that this helps at least one person! If you have any questions, remarks or suggestions, please reach out through the contacts page or leave a comment here. Until next time!
References
https://www.virtualizationhowto.com/2024/11/windows-server-2025-proxmox-packer-build-fully-automated
https://www.udemy.com/course/hashicorp-packer
https://learn.microsoft.com/en-us/windows-hardware/get-started/adk-install
https://developer.hashicorp.com/packer
https://developer.hashicorp.com/packer/integrations/hashicorp/proxmox/latest/components/builder/iso
Great
Well done 🙂 It’s really helpful and explanation is completely clean.
Thank you 🙂
Thanks for that!